Note: This post is part of a series of posts about Prefect. If you haven’t read the previous post, I recommend reading it first.
Introduction
In the previous post, we have learned about Prefect, and we have created a simple Prefect flow that makes a GET request to the Bored API, prints the response to the console, and saves it as a Prefect artifact. Nevertheless, we ran our flow directly from the CLI as a Python script. Although it works, it is not a good solution for scheduling our flow in production.
In this post, we will learn how to schedule our flow to run every day at 9:00 AM. By the end of this post, we will have a Prefect deployment that makes a GET request to the Bored API every day at 9:00 AM, and saves the response as a Prefect artifact.
Assumptions
As in the previous post, we will assume that we have a Python 3.10+ environment with Prefect installed. This time, we will also assume that we have the code from the previous post in our project. You may also view the source code for this post here.
Once again, we will only cover the basics of each topic. For more details, please refer to the Prefect documentation.
Prefect Architecture
Before we dive into the details, we need to have a basic understanding of the Prefect architecture.
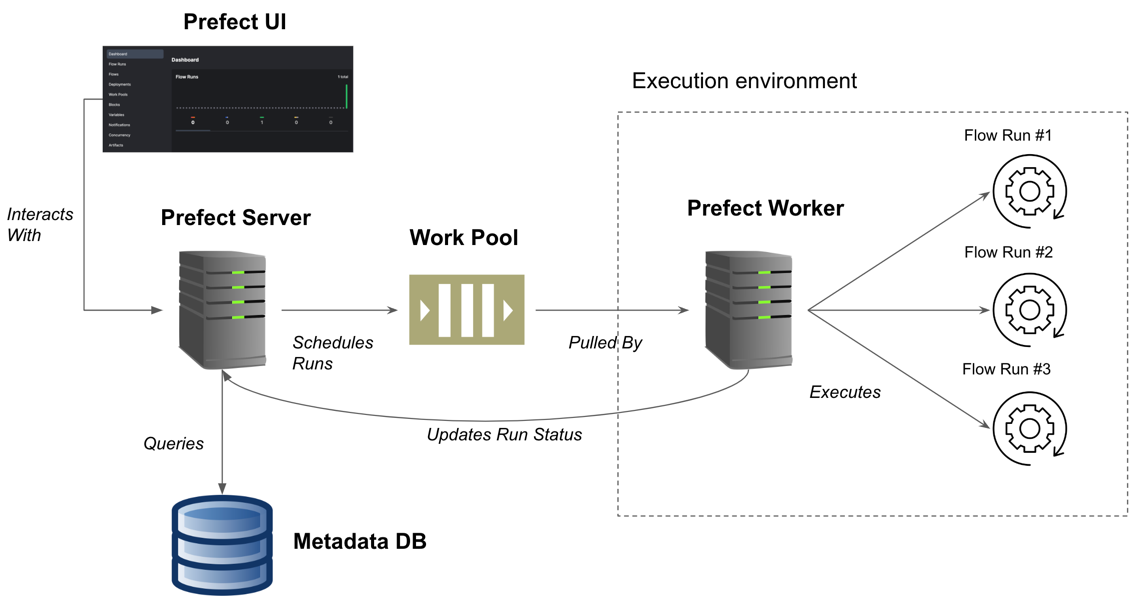
As we can see in the image above, Prefect consists of following components:
- Prefect Server: Python server that is responsible for managing the Prefect API, registering flows, and storing flow runs and artifacts.
- Prefect UI: Web application client for Prefect Server.
- Work pools: Like a pub/sub topic that is used to distribute work to Prefect workers.
- Prefect worker: Python server that lives on the execution environment. It is responsible for pulling flow runs from the work pool, and executing them.
Of course, this is a simplified view of the Prefect architecture. For more details, please refer to the Prefect documentation.
The Deployment Pattern
In a nutshell, we need to deploy our flow as a Prefect deployment, and then schedule the deployment to be pulled by a Prefect worker every day at 9:00 AM.
It all comes together like this:
- We create a Prefect flow (that’s what we did in the previous post).
- We deploy the flow as a Prefect Deployment: a versioned and executable representation of a flow. A deployment is the entity that connects the flow code to the execution environment.
- We schedule the deployment to be pulled by a Prefect worker every day at 9:00 AM.
- The Prefect worker pulls the deployment from the work pool, and executes it on the execution environment where it lives.
- Upon completion (or failure) of the flow run, the Prefect worker informs the Prefect API about the result.
Deploying our Flow
Prefect allows us to deploy our flow using a YAML file, or using the Python API. In this post, we will deploy our flow using the Python API.
Creating a deployment
Let’s add a new deploy.py file to the root of our project. Then, let’s add the following code to it:
import asyncio
from prefect.deployments import Deployment
from flows.suggest_activity import suggest_activity


async def main():
    deployment = await Deployment.build_from_flow(
        name="Daily",
        flow=suggest_activity,
        work_pool_name="activities"
    )

    await deployment.apply()

    print("Deployment created!")


if __name__ == '__main__':
    asyncio.run(main())
As we can see, we are importing our flow from the flows.suggest_activity module,
as well as the Deployment class from the prefect.deployments module and the asyncio module.
The reason for importing the asyncio module is that the Prefect API is asynchronous,
and in order to use it, we need to run our code in an async function. That’s why we are using the asyncio.run() method to run our main() function.
If you are not familiar with the asyncio module, I recommend reading this article.
In the main() function, we are creating a new deployment for our flow. Note that we are passing the work_pool_name argument to the Deployment.build_from_flow() method.
Later, we will pass the same name to the prefect worker start command, so that the Prefect worker will pull the deployment from the correct work pool.
Finally, we are applying the deployment to the Prefect API by calling the apply() method.
That’s all the code we need to create a deployment for our flow. Please note, that we are not scheduling the deployment to run every day at 9:00 AM yet. We will do that later using the Prefect UI.
Finally, run the following command in the CLI to deploy our flow:
python deploy.py
Now, let’s learn how to spin up the environment and run the deployment.
Launching the Prefect environment
In order to run our deployment, we need to launch a Prefect server and a Prefect worker.
In order to launch the Prefect server, we need to run the following command in the CLI:
prefect server start
If everything goes well, we should see the following output:
 ___ ___ ___ ___ ___ ___ _____
| _ \ _ \ __| __| __/ __|_   _|
|  _/   / _|| _|| _| (__  | |
|_| |_|_\___|_| |___\___| |_|

Configure Prefect to communicate with the server with:

    prefect config set PREFECT_API_URL=http://127.0.0.1:4200/api

View the API reference documentation at http://127.0.0.1:4200/docs

Check out the dashboard at http://127.0.0.1:4200
As we can see, the Prefect server is now running on http://localhost:4200.
Now, open a new terminal window, and run the following command to launch a Prefect worker:
prefect worker start -p activities
This command will launch a local-process Prefect worker that will pull deployments from the activities work pool.
This is the same work pool that we have passed to the Deployment.build_from_flow() method in the deploy.py file.
In production, we would probably use another worker type, such as kubernetes or ecs.
But for the sake of simplicity, we will use the local-process worker.
If everything goes well, we should see the following output:
Work pool 'activities' does not exist and no worker type was provided. Starting a process worker...
Worker 'ProcessWorker 295d558e-5ade-47e7-8bf9-21f4989fdd8d' started!
21:45:34.717 | INFO    | prefect.worker.process.processworker 295d558e-5ade-47e7-8bf9-21f4989fdd8d - Work pool 'activities' created.
Keep this window open as well. Now, Our deployment is ready to be tested. It’s a good time to get familiar with the Prefect UI.
The Prefect UI
Let’s open the Prefect UI in our browser by navigating to http://localhost:4200.
You should see a screen similar to this:
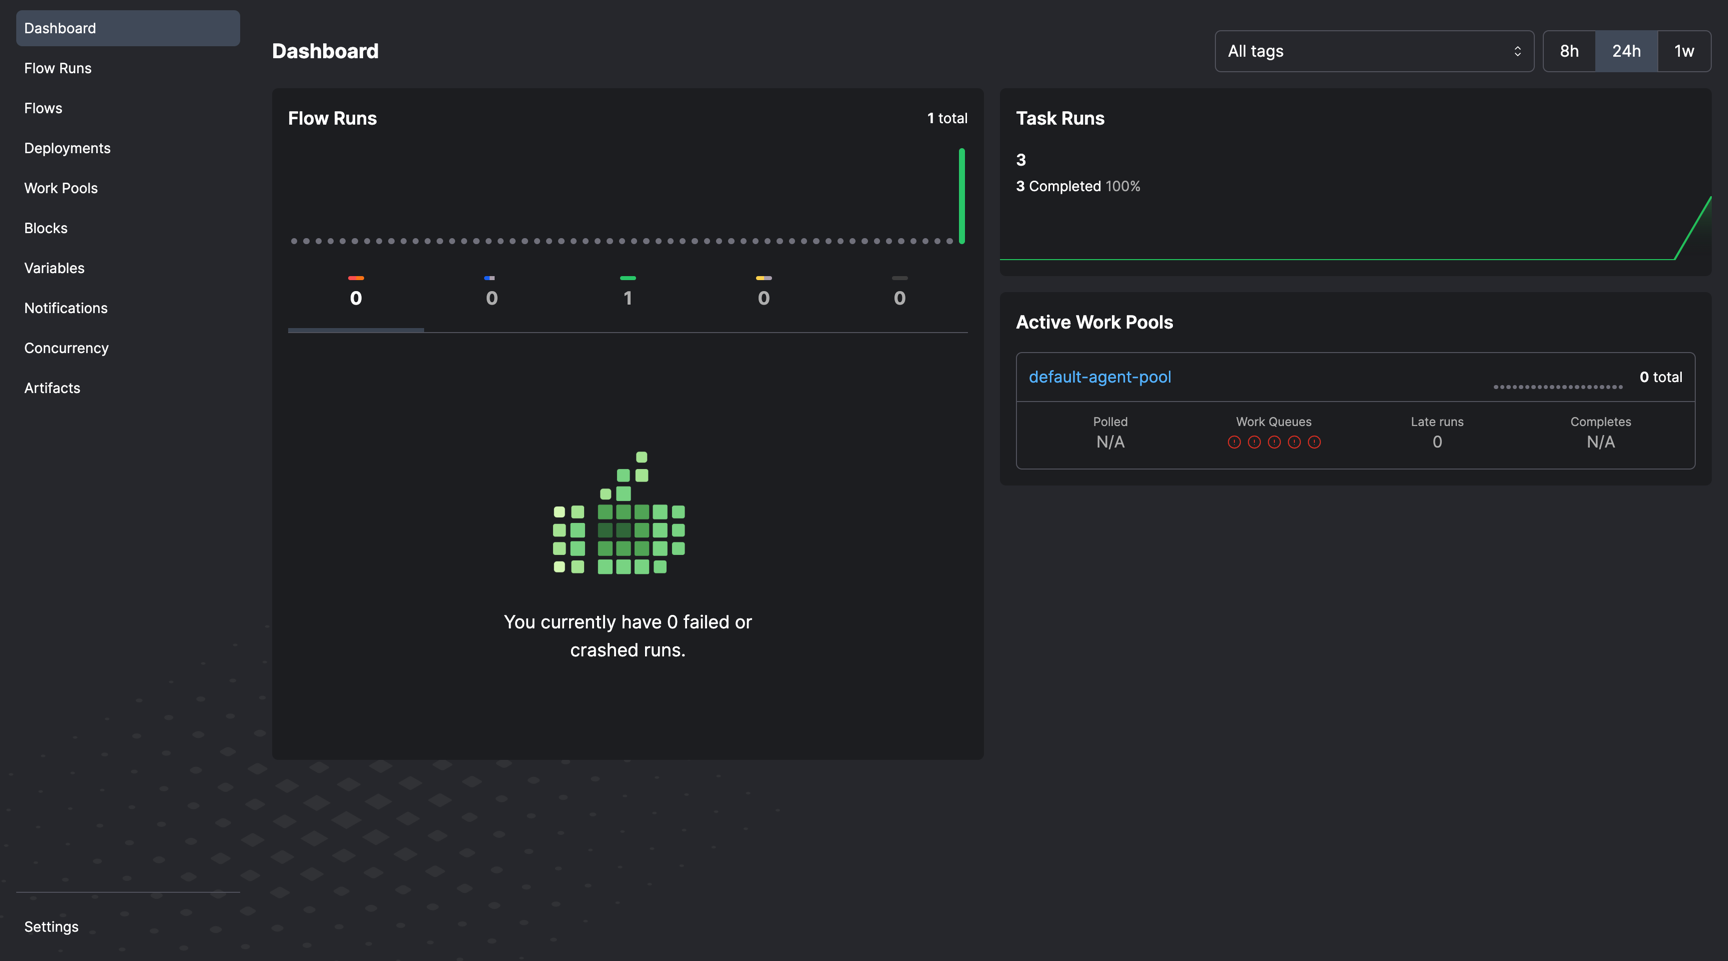
Currently, we see the dashboard page, that gives us a high level overview of our flow runs and work pools. Let’s navigate to the Deployments page by clicking on the Deployments link in the sidebar.

As we can see, our suggest-activity / Daily deployment is listed in the deployments table.
Also, we can see that the deployment is not scheduled yet - we know that because the schedule column is empty.
Let’s trigger a flow run by clicking on three dots icon on the right side of the table, and then clicking on the Custom Run button:
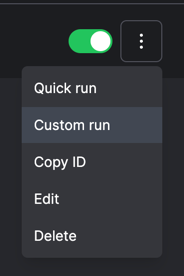
We will be redirected to the Run page, where we can modify the flow run parameters (if we had any), and trigger the flow run by clicking on the Submit button:

Let’s click on the Submit button. We should be redirected to the Deployment Runs page, where we can see the flow run that we have just triggered:

In the background, the Prefect worker is pulling the deployment from the work pool, and executing it as a local process.
Let’s click on the flow run’s name (in our case, it’s pi68-humboldt) to go to the flow run’s page:
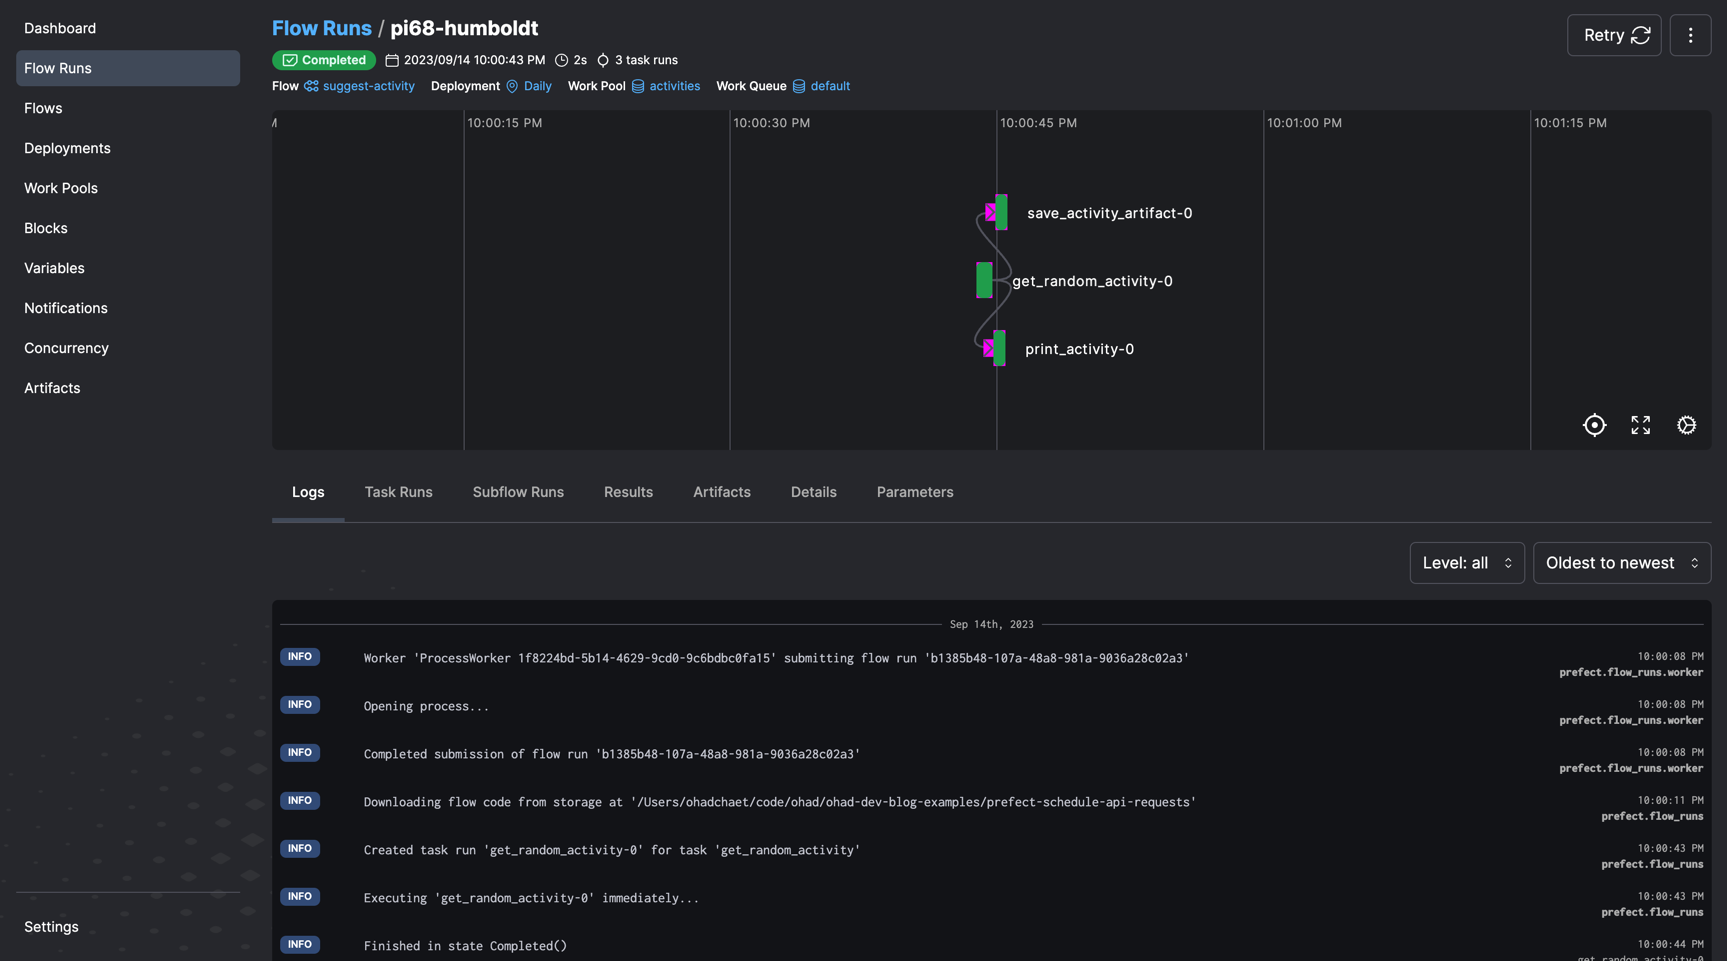
At the top of the page, we can see a representation of our flow’s DAG. Each task is clickable, and the color of the task indicates its status. Under the DAG, we can see the flow run’s logs, as well as tabs for the flow run’s artifacts, parameters and more.
Let’s click on the Artifacts tab to see the flow run’s artifacts:

We can see that our flow run has one artifact, which is the response from the Bored API. Let’s click on the artifact’s card to see its details:
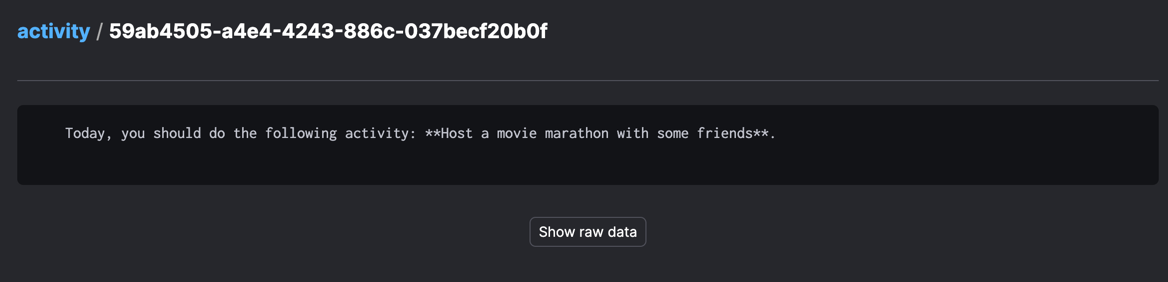
Success! We can see that the artifact contains the response from the Bored API. The only thing left to do is to schedule our deployment to run every day at 9:00 AM.
Scheduling our deployment
Let’s head back to the Deployments page (using the sidebar),
click on the three dots icon on the right side of our suggest-activity / Daily deployment,
and then click on the Edit button:

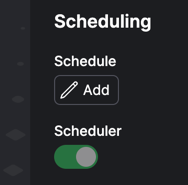
We will be redirected to the Edit Deployment page. Let’s scroll down to the Scheduling section, and click on the Add button:
The Add Schedule modal will appear.
Let’s select the Cron option, and then type 0 9 * * * in the Cron Expression field.
If you are not familiar with cron expressions,
I recommend heading over to crontab.guru and playing around with it.
This is how the modal should look like:
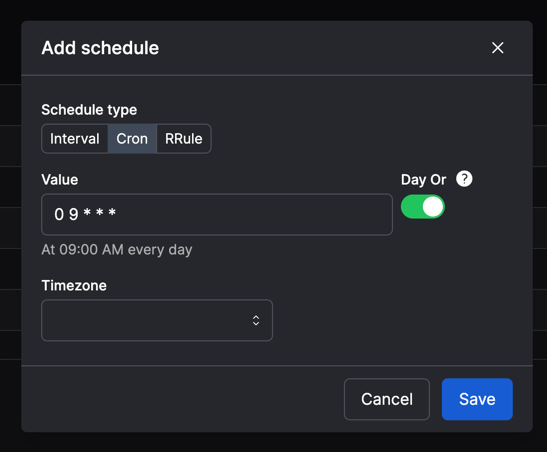
Then, let’s click on the Save button to add the schedule to our deployment. The modal will close, and we will be redirected to the Edit Deployment page. Finally, let’s click on the Save button to save our deployment. We should be redirected to the Deployments page. As we can see, our deployment is now scheduled to run every day at 9:00 AM:

That’s it! We have successfully scheduled our flow to run every day at 9:00 AM. As long as the Prefect server and worker are running, our flow will run every day at 9:00 AM, and suggest new activities for us to do.
Conclusion
In summary, we’ve come to the end of this post and our entire series. In these articles, we’ve covered how to set up workflows to run daily at 9:00 AM and how to use the Prefect UI to keep an eye on these workflows and their results.
If you followed along, you now know how to create, deploy, and schedule Prefect flows for automated runs. I hope you found this series useful and enjoyable. Please share your thoughts and feedback with me on Twitter.
Thank you for reading, and stay tuned for more content in the future!